
This quick-start guide demonstrates how to get connected on the bench with the Mini OEM radios with the evaluation kit.
Simple Configuration
The Simple Configuration Menu is the same across all Doodle Labs radios.
Mini OEM
Connecting to the Radio Network
Accessing the Web GUI
Simple Configuration
Components and Accessories

- Attenuators
- Breakout Board
- RJ45 Cable
- MMCX to SMA Cables
- Antennas
- JST Connectors
- Heat Sink w/ Thermal Sticker
- USB Cable
- JST to USB-A Cable
The thermal sticker is sticky on both sides. This can be used to affix the heat sink to the back of the Mini. Press and hold for 10 seconds to ensure solid adhesion.
It is suggested to use the included attenuators when working with radios in close proximity. This reduces the amount of radiated power to help ensure the signal is not too "loud" for other radios you intend to connect to.
The cables with JST connectors connect straight across, as seen in the diagram below.
For a more detailed description and pinout, refer to the Connector Descriptions.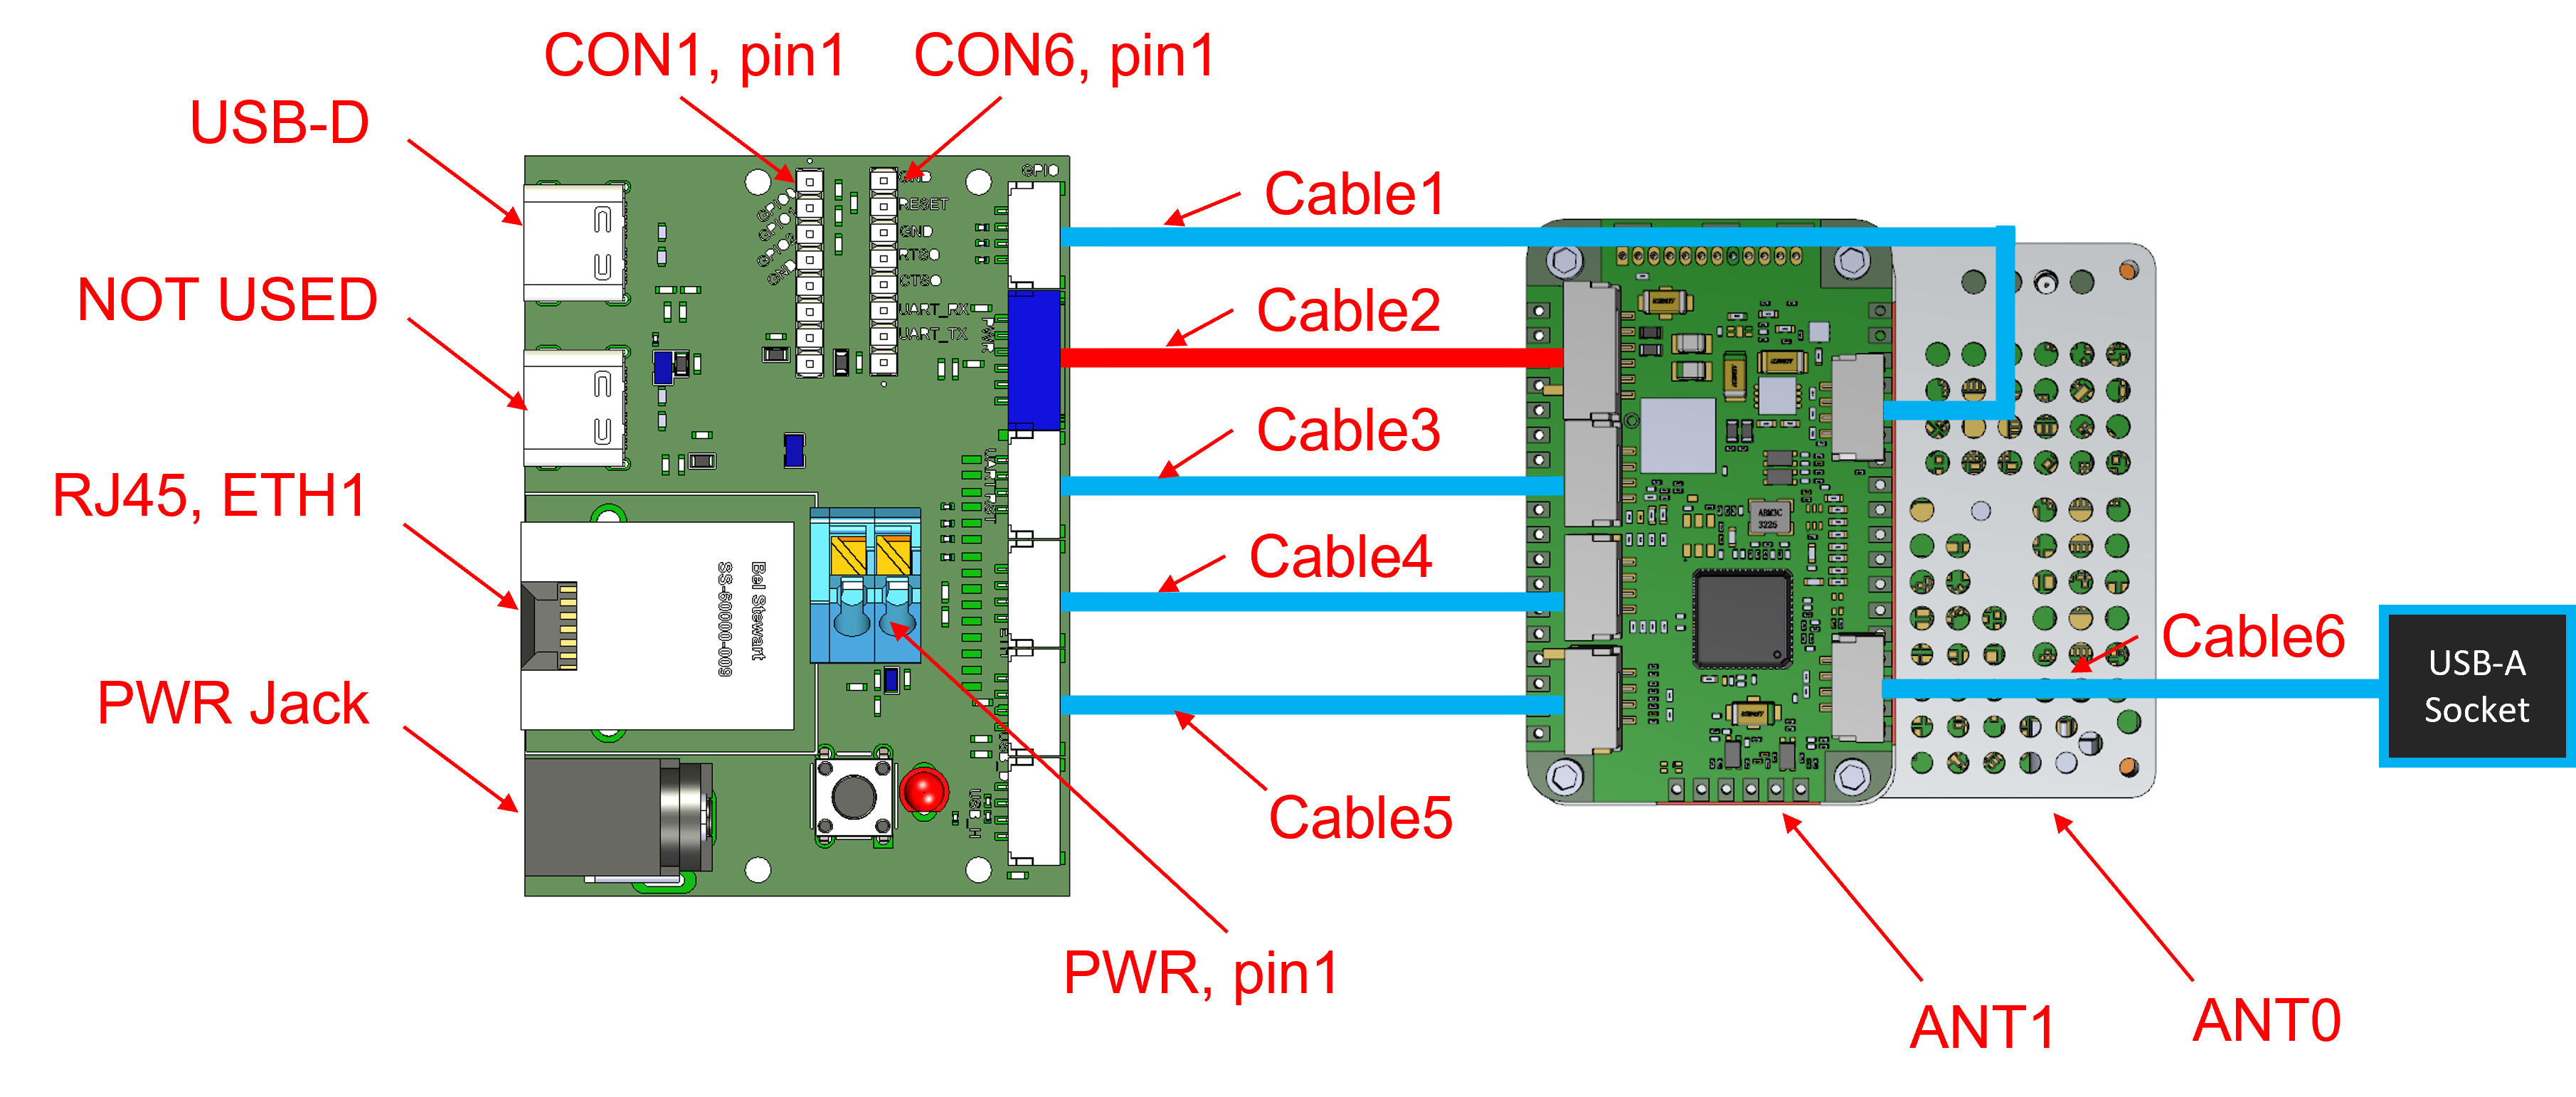
Powering the Radio
The radio can be powered via the terminal block or with a standard 2.5mm barrel jack (not included with the evaluation kit). The Mini takes 5V DC +/- 5%. It will, at maximum usage consume 10 watts, with an average draw of 7 watts. For more details, refer to the datasheet listed under the specific model's page on the product index.
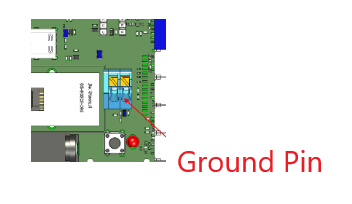
Terminal Block: If powering via the terminal block, it is critical to ensure you have the correct polarity and that the leads do not touch each other or the radio will short circuit. It is suggested to crimp your cables with ferrules to help prevent short circuits. Depressing the button will open the "jaws" of the connector and releasing it will clamp on to the wire or connector, ensuring a solid connection.
Barrel Jack: Another way to power the radio is with the 2.5mm positive pin polarity barrel jack. This is considered a safer way to deliver power, as the likelihood of shorts is much less.
Despite there being an LED on the breakout board, many users are surprised to find that upon powering, the LED does not illuminate. By default, there is no visual indicator that the radio is powered. However, this LED can be programmed to be a status light.
The below image shows a fully connected Mini powered via barrel jack:

Connecting to the Radio
There are two different methods available to get your network connected to the radio, which enables access to the Web GUI and SSH for configuration.
Connecting via USB
The radio features a virtual network interface available over USB. Upon connecting a USB-C connector to a host machine such as a laptop or desktop computer a new network interface is available if the machine supports it. This is confirmed working on a default Windows 11 and Ubuntu 22.02 desktop installation. The below reference images were taken from Ubuntu 22.02, but the process is similar for Windows. 
By default, there is not a DHCP server running on the radio. Your computer will not receive an IP address on this interface. The network must be configured manually. All Mesh Rider radios come with a sticker on them that display their default IP address. This address will be in the 10.223.X.X range. You may choose any IP on this subnet for your connecting computer, so long as it does not match the IP on the radio's sticker. If you use the radio's IP address, you will create an IP conflict and have difficulty accessing the radio. 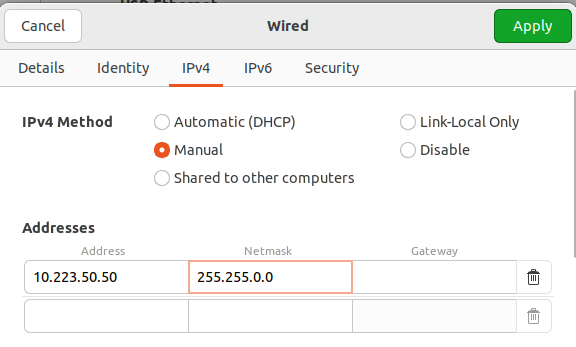
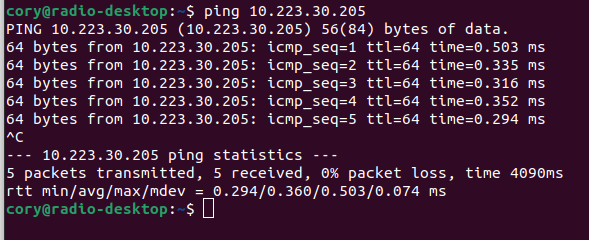
After manually configuring this network and restarting the interface (disable, then re-enable), you can verify the connection to the radio via a ping test. 
Connecting via Ethernet
To connect to the radio's network via ethernet, connect the RJ45 plug into the breakout board and the other end into a network interface on the computer you wish to connect.
As with the USB connection, by default, there is not a DHCP server running on the radio. Your computer will not receive an IP address on this interface. The network must be configured manually. All Mesh Rider radios come with a sticker on them that display their default IP address. This address will be in the 10.223.X.X range. You may choose any IP on this subnet for your connecting computer, so long as it does not match the IP on the radio's sticker. If you use the radio's IP address, you will create an IP conflict and have difficulty accessing the radio.

After manually configuring this network and restarting the interface (disable, then re-enable), you can verify the connection to the radio via a ping test.
Accessing the Web GUI
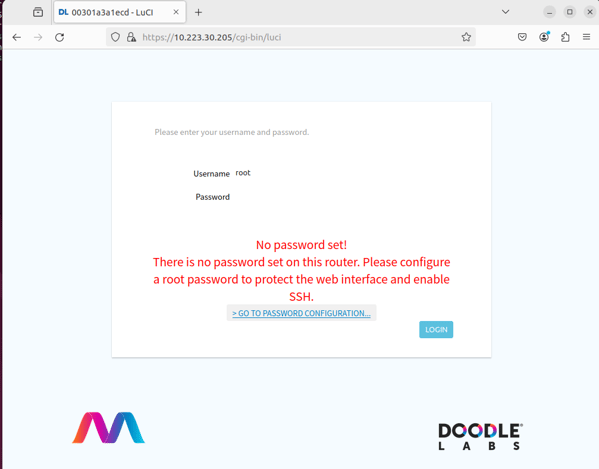
With a connection to the radio's network via USB or Ethernet, it is possible to access the Web GUI used to configure the radio. To access to the Web GUI, navigate to the IP address of the radio in your browser. Since the radio has a self-signed security certificate, you'll likely have to allow an exception to allow the certificate. On Firefox, click Advanced, then click "Accept the Risk and Continue"
You will then be presented with login screen for the radio. By default, there is no root password set. You may click login with no password to continue, at which point you'll be presented with the Simple Configuration page.
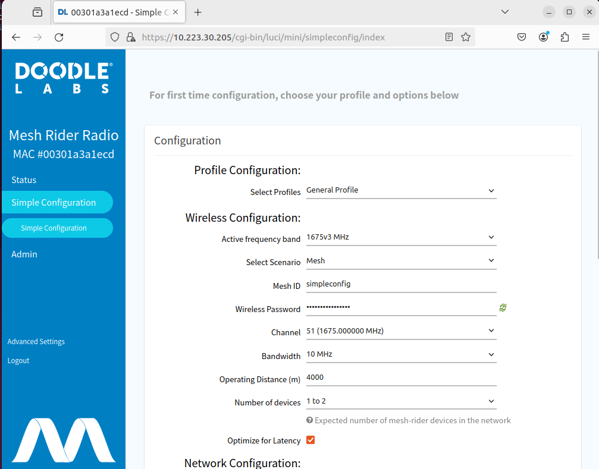
Simple Configuration
The simple configuration menu can be thought of as a setup wizard. There is a list of profiles to choose from that contain settings for some of the most common applications. Selecting one of these profiles will load the default settings. Additional settings may be modified. With factory settings, radios of the same model will connect to each other.